Dev Blog - How to build a holodeck, week four
Capturing the world in realtime into VR? done that. How about with texture mapping? Videos below!
TL;DR
Week four - back in the garage
This week’s progress
Last week, I spent a chunk of time getting the realtime mesh capture working, up to the point of having it appearing directly into VR while walking around the house. That was awesome fun, but the resulting environment really looked like VR from the 80s.
The quality of the mesh can be improved by making it more granular (more vertices in the world for the same size mesh), but I was interested to see what would happen if I put textures taken from the Tango colour camera directly onto the mesh surface.
Getting the texture from the camera
Tango captures textures in YUV format, which isn’t a native Unity format. This means I have to convert it into RGB. Fortunately, there’s an example shader that does this, and I’ve got a process that generates an RGB RenderTexture realtime from the YUV feed using Graphics.Blit.
One thing that took a while to get correct is figuring out where the picture is taken from (the Colour Camera’s pose, relative to the world). I’ve had to trawl through the AR code samples to find the correct pose frames (Camera to IMU, IMU to Device). I mistakenly thought that the colour camera was in the middle of the device facing forward, but it’s not - it’s 60mm to the right of centre, and it faces about 15 degrees up from forward.
Happily, once I plugged in the correct pose for the color camera into the camera feed, everything started to line up (mostly!)
Originally, I wanted to just save as many frames from the camera as I could, potentially directly to device, so that exporting the textured mesh would be a trivial process. Converting from a RenderTexture to a Texture2D isn’t a trivial process, due to RenderTexture objects being held GPU-side. The conversion is currently horribly slow, and definitely not something I want to be doing while trying to maintain VR framerate, so for now I’m sticking with RenderTextures while drawing the scene, and I’ll have to bake them out to device at export time.
Texturing the mesh
I’m using the Chisel implementation provided with the Tango SDK to turn the point cloud (generated by the Tango’s depth sensor) into a mesh. Chisel does some very clever things, but some of those things mean it’s pretty tricky to texture the mesh. For starters, the chisel implementation basically updates in coarse grid cubes, each 161616 aliased vertices across. If the resolution of the meshing process is set to e.g. 50mm, this gives a grid cube 0.8m on each side.
Chisel doesn’t have any temporal coherency from update to update. Each 5hz update gives a totally new mesh inside the grid cube. This means I can’t easily grab triangles from the grid to texture them - I have to look at the whole grid cube and work with the mesh in one go right now.
To work around this, I basically “freeze” the grid cube, and then apply a texture across the whole cube. This gives ok results, but it’s very much a first-pass implementation - there’s a load of ways to improve this.
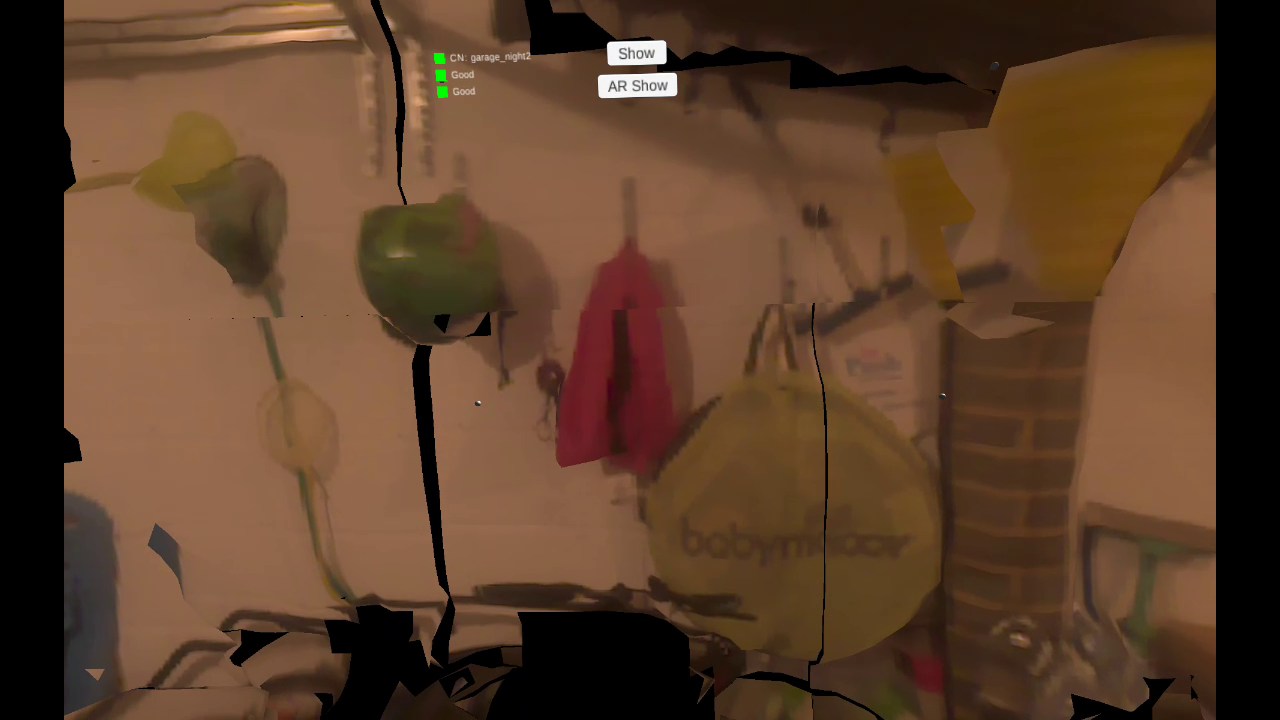
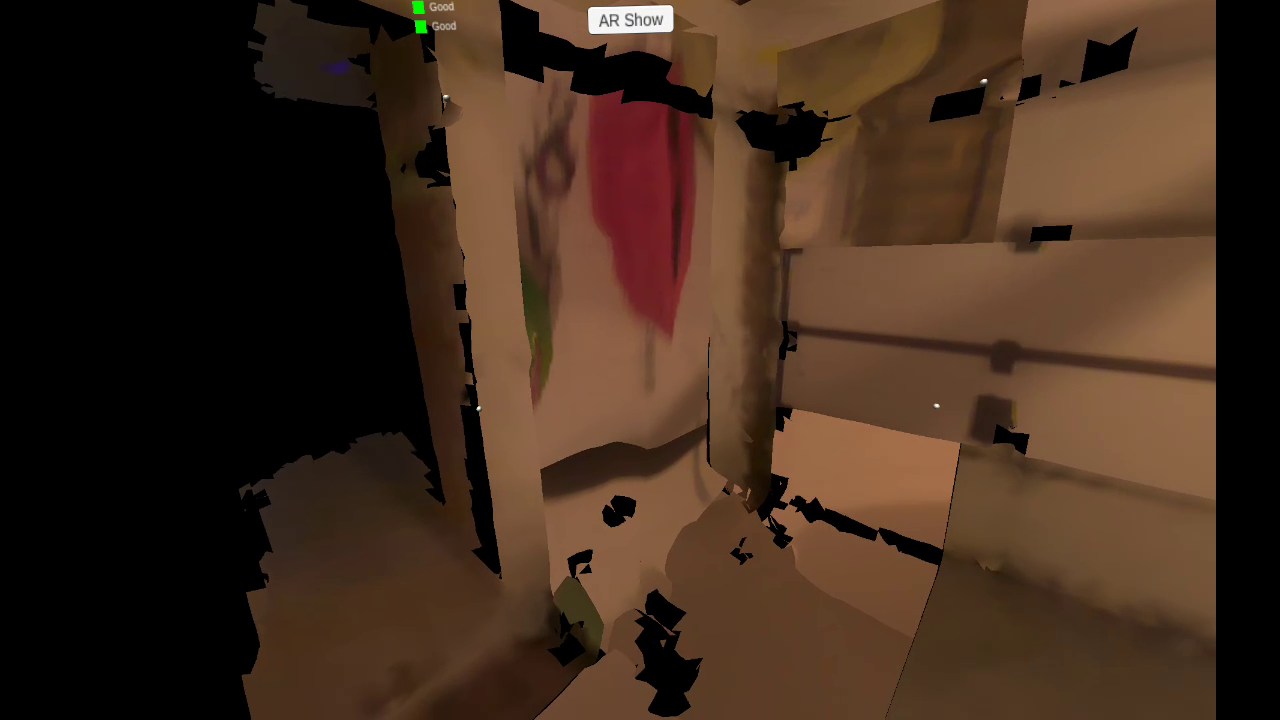
As long as you stand at the right angle - and don’t move around too much - and get lucky with the texturing projection - it looks great! Well, kinda.
Problems with the current method
Where to begin? There’s many!
I’m applying a single texture across the whole mesh in each grid cube, and that means there’s loads of triangles that are not at a good orientation to the texture pose (the normal would ideally be pointing orthogonally to the texture). This means you often get things in the world projected across faces they shouldn’t be on, especially if they are floating objects with thin geometry (wires, pipes, broom handles, that sort of thing).
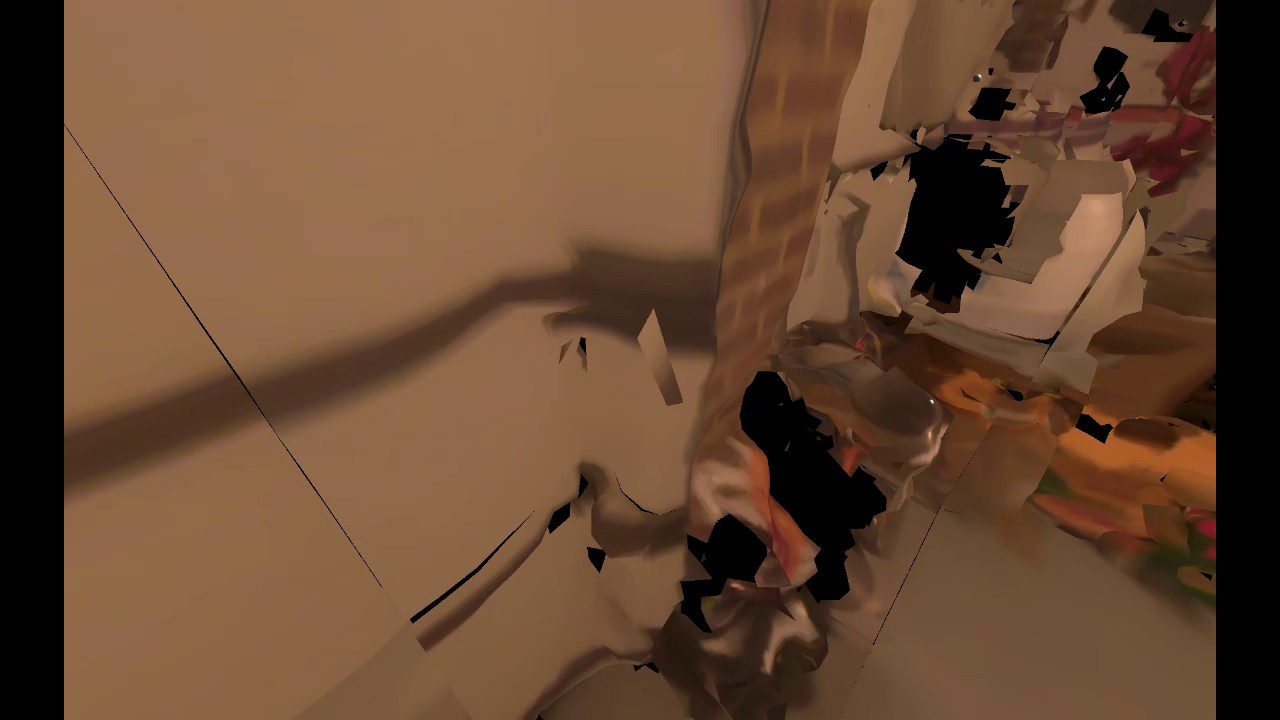
Once I’ve frozen the grid cube, I can’t go back later (yet!) and re-apply a different texture. Once it’s done, it’s done … which means any missing polygons stay missing, any badly projected triangles stay looking bad.
Because I’m freezing the cube, any adjacent cubes remain mutable, and the edges very quickly go out of alignment. I can look at welding these up later, but it currently makes the grids very obvious where they don’t line up.
Any holes in the grid remain once it’s frozen, and I’ve not got any clever plans for how to fix this, other than trash the frozen grid and start again.
The device has a limit on the number of RenderTexture objects it can handle, and after a while I think I’m blowing this limit, meaning random textures start getting applied over previously textured objects (the uv mapping uses the wrong base texture). I’m not 100% sure this isn’t a bug in my mapping process, but I have a feeling this will be tricky to fix, and it crops up pretty fast currently.
The camera pose seems to match up as long as I move slowly, but I’m guessing there’s a frame or so latency between where I think it is and where it actually is, meaning the projection looks terrible if the capture applies during rotation or translation. I’m also not sure I’ve got the correct projection across the whole frame - I think I might need to project spherically instead of planar, but I’ve yet to test it.
Improvements to the current method
There’s loads of opportunities here. I’ve got a few plans for applying multiple textures across the faces, Ive got a few plans for more efficient texture usage, and I’ve got a plan for welding the cubes. I’m not sure what will be the best way to update the mesh after it’s frozen, that’s going to take some thought.
The texturing process is currently automated (every 1-2 seconds I take a frame from the camera and apply it). I think this gives questionable results, having a button press to apply to the environment on demand would likely look much better.
Because I’m texturing a whole cube, I’m checking the whole cube fits in the projector frustum before I apply it. this means it’s highly unlikely to use the whole texture, and I can’t get right up close to objects and get super-high-res textures on them. Once I get multitexturing working per grid cube, I’ll be able to fix that.
Switching from Chisel to something that is temporally coherent would give potentially better results, although having it running realtime and with decent results is probably good enough, for now. Replacing Chisel is on the todo list, but it’s falling further down by the day.
Help!
Not sure what would be most useful this week - a Collada or DXF exporter is still probably top of the list. One of the other devs on the Google+ Tango group is working on Avatar capture, and I’m looking forward to his results. A fast, stable method of turning a RenderTexture into a Texture2D would also be very useful!
Next week …
Lots of options here. I could get the mesh saved to device (ideally in a transport format that is importable in other packages, like Collada) - I think there’s huge value here.
I could also step away from the shiny, and get some of the networking groundwork done.
My brother has recently purchased a Dive to go with his Tango, and I’ve also got another Dive myself, so in theory we’re hardware-ready to get two or three people in the same virtual space. Awesome!
One month in, and I’m about as far along I as I hoped to be. Balancing work and family is proving interesting, but I think I’m making good progress so far. Next month, I’m pretty sure the honeymoon will be over, and I’ll start to slow down a bit. I’ll be keeping up with the weekly updates, though!
If you’re interested in progress updates, follow me on Twitter (@evryway) or subscribe to the youtube channel - links below!